

Hey there! As a supplier of Paver Block Moulds, I often get asked about how to adjust the settings of these moulds for different block sizes. It's a crucial aspect that can make or break your paving project, so I'm here to share some practical tips and insights.
First off, let's understand why adjusting the mould settings is so important. Different projects call for different block sizes. Whether you're working on a small residential driveway or a large commercial plaza, having the flexibility to create various block sizes is essential. It not only allows you to meet the specific requirements of your clients but also gives you a competitive edge in the market.
Now, let's dive into the steps of adjusting the Paver Block Mould settings for different block sizes.
Step 1: Measure and Plan
The first thing you need to do is measure the exact dimensions of the blocks you want to create. This includes the length, width, and height. Use a reliable measuring tool, like a tape measure or a caliper, to ensure accuracy. Once you have the measurements, make a detailed plan. Jot down the adjustments you'll need to make to the mould. This step is crucial as it sets the foundation for the entire process.
Step 2: Adjust the Mould Cavities
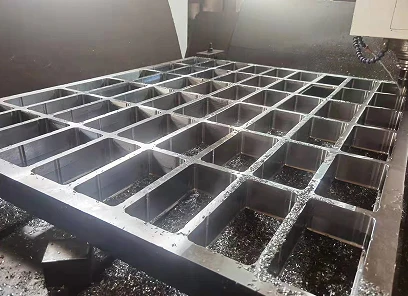
Most Paver Block Moulds come with adjustable cavities. These cavities are where the concrete or other paving materials are poured to form the blocks. To adjust the cavities for different block sizes, you'll need to loosen the locking mechanisms. These are usually screws or bolts that hold the cavity walls in place. Once the locking mechanisms are loose, you can move the cavity walls to the desired position. Make sure to align the walls properly to ensure uniform block sizes. After adjusting the walls, tighten the locking mechanisms again to secure them in place.
Step 3: Modify the Mould Base
The base of the Paver Block Mould also plays a significant role in determining the block size. In some cases, you may need to modify the base to accommodate different block dimensions. This could involve adding or removing spacers. Spacers are small pieces of material that can be placed under the mould to adjust its height. If you're making larger blocks, you may need to add spacers to increase the height of the mould. Conversely, if you're making smaller blocks, you can remove some spacers to lower the height.
Step 4: Check the Alignment
After making the adjustments to the cavities and the base, it's essential to check the alignment of the mould. Use a straight edge or a level to ensure that the mould is perfectly aligned. Misaligned moulds can result in uneven blocks, which can affect the overall quality of your paving project. If you notice any misalignment, make the necessary adjustments until the mould is straight and level.
Step 5: Test the Mould
Before you start mass-producing the blocks, it's a good idea to do a test run. Pour a small amount of concrete or paving material into the mould and let it set. Once the material has hardened, remove the block from the mould and check its dimensions. Measure the length, width, and height of the block to ensure that it matches your desired specifications. If the block size is off, go back and make further adjustments to the mould settings.
Step 6: Fine-Tune the Settings
Based on the results of the test run, you may need to fine-tune the mould settings. This could involve making minor adjustments to the cavity walls or the base. Keep testing and adjusting until you achieve the perfect block size. Remember, precision is key when it comes to paving blocks, so take your time and don't rush the process.

Tips and Tricks
- Use High-Quality Materials: The quality of the materials you use in your Paver Block Moulds can have a significant impact on the final product. Invest in high-quality concrete or paving materials to ensure that your blocks are strong and durable.
- Keep the Mould Clean: Regularly clean your Paver Block Moulds to prevent the buildup of dirt and debris. This can affect the block size and quality. Use a mild detergent and a soft brush to clean the mould after each use.
- Lubricate the Mould: Applying a lubricant to the mould before pouring the concrete can make it easier to remove the blocks once they have hardened. This can also help prevent damage to the mould.
Where to Find the Right Paver Block Moulds
If you're in the market for high-quality Paver Block Moulds, look no further. We offer a wide range of Mould for Paver Block that are designed to meet the needs of different projects. Our Paver Moulds For Sale are made from durable materials and are built to last. We also have a variety of Paving Stone Mould For Sale that can be adjusted to create different block sizes.
Contact Us for More Information
If you have any questions about adjusting the settings of our Paver Block Moulds or if you're interested in purchasing our products, feel free to reach out. We're here to help you with all your paving needs. Whether you're a professional contractor or a DIY enthusiast, we have the right solutions for you.
References
- "Paving Block Manufacturing Handbook" - A comprehensive guide on the manufacturing process of paving blocks, including mould adjustment techniques.
- "Concrete Masonry Handbook" - Provides in - depth information on the properties of concrete used in paving blocks and how it interacts with different mould settings.